Everything takes getting used to, and so does using a new environment.
To help you quickly get to grips with the environment, we've put together a short explanatory guide. If you can't find the answers to your questions in the guide, you can write to us at helpdesk@onlineexpo.com and we'll get back to you as soon as we can.
1. Enter the following address in your internet browser https://www.onlineexpo.com/admin/
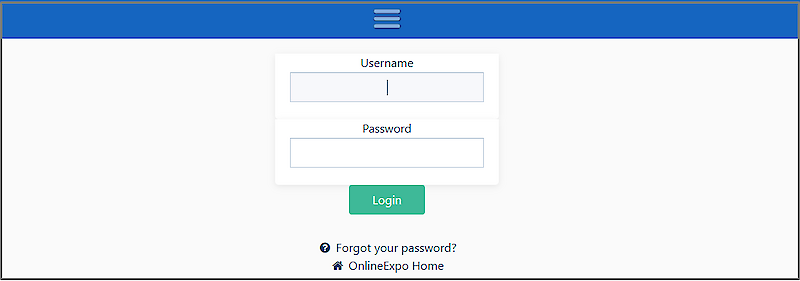
2. Enter your username and password and press the "LOGIN" button
3. You have successfully logged in to the OnlineExpo environment when the name of your stand is displayed

1. Enter the following address in your browser https://www.onlineexpo.com/admin/
2. Press the " Forgot your password?" button.
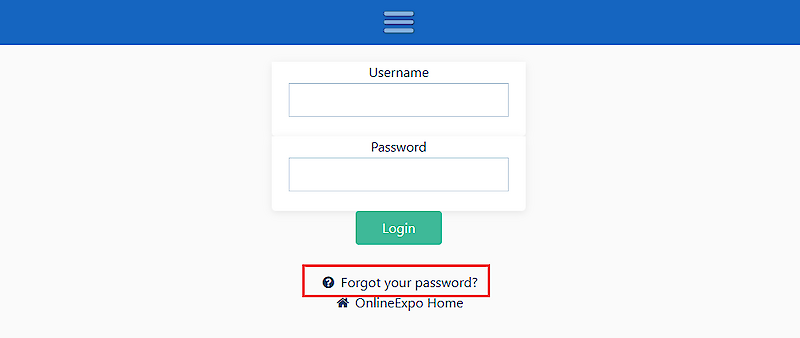
3. Enter the email address by which your account is registered. The system will forward the instructions to your e-mail
4. Open your e-mail account. You will find a letter with a unique code and a link to change the password - also check the "Spam".
5. Click on the link and enter the code sent by the system, your e-mail and the new password.
6. Click the "Submit" button
The password has been updated and you can login to your account.
1. Log in to the environment
2. Move the cursor over the name of your page name. A pop-up menu will appear.
3. Click the "Edit" button. The admin side of the page will open with fields where you can start entering/editing information.


To save the information, press the "SAVE" button at the top or bottom of the page.
1. Move the cursor to the top right icon/image. A pop-up menu opens
2. Click on "Logout".

Here you will find instructions on how to create and configure subpages.
1. Log in to the environment
2. Move the cursor over the name of your page name. A pop-up menu will appear.
3. Click the "Edit" button. The admin side of the page will open with fields where you can start entering/editing information.
To save the information, press the "SAVE" button at the top or bottom of the page.
1. In the "Page title" field, click on the existing page title.
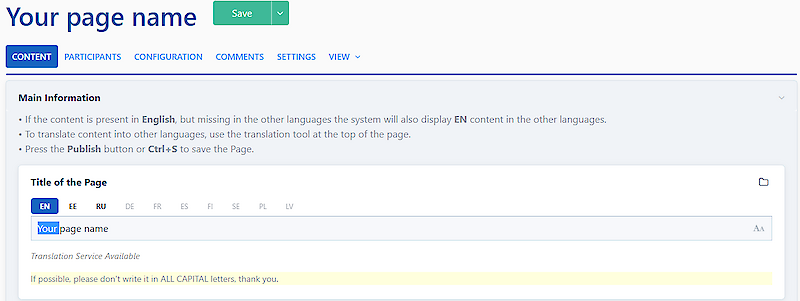
2. Make the appropriate change to the title and click on the "SAVE" button at the top or bottom of the page.
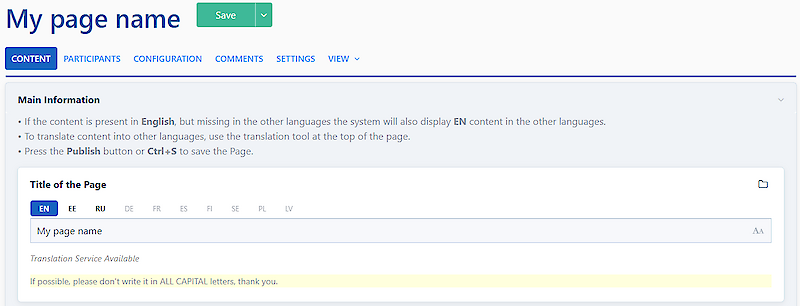
The translation tool always translates the content from the first language in the language selection.
1. Enter the text in the first language choice
2. Click on the language selection to which you want to translate the text.
3. Click on the "Translate from ..." button below the field.
4. The system will insert the translated text into the language you selected.
![]()
![]()
Press the "SAVE" button at the top or bottom of the page to save the translation.
IN ADDITION, you can also use a comprehensive translation tool.
1. Click on "Translation tool" in the menu bar.
A pop-up window will appear where you can enter the text you need translated. In the box next to it, you can select the language into which the system should translate the text.
![]()
![]()
This option is only available to the event organiser.
1. Fill in the content of the page in your preferred language.
2. Click on "Translate" under the page title and select the source language (the language you have the content in) and the language you want to translate the page into.
3. To translate sub-pages, activate the "Translate children?" checkbox.
4. Press the "Translate" button to apply the translation.
![]()
![]()
1. Click on the SETTINGS button on the menu bar.


2. Activate the "Unpublished" or "Hidden" checkboxes under the Status topic.

3. Press the "Save" button.
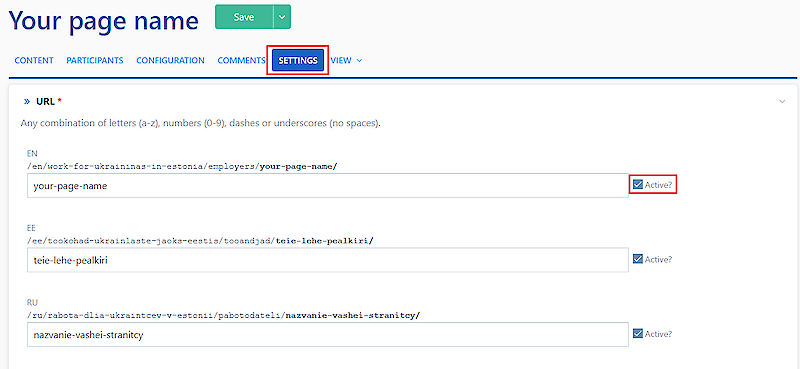
1. Select "SETTINGS" from the top menu bar.
2. Click on the text "Page URL to edit". The URLs of the different language options will appear, which you can change as you wish.
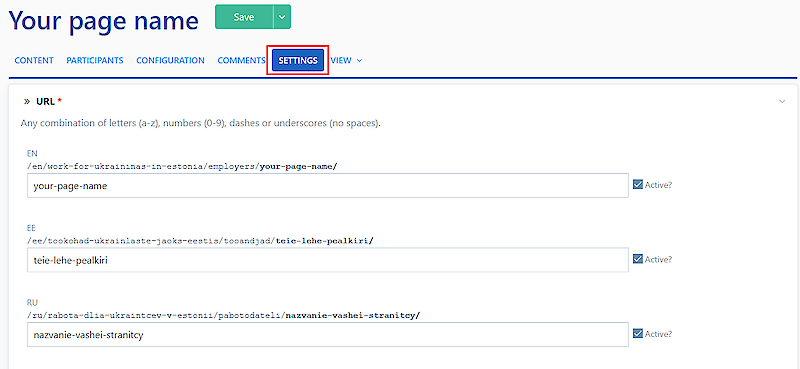
1. Click on "SETTINGS" in the top menu bar.
2. Click on the text "Page URL to edit". The URL fields for the different language options will open.
3. Click on the box behind the language choice to activate the language choice. If there is a tick behind the URL, this language option is already active on the page. You can see active language options on top of each field (EN, EE, RU, etc.). 
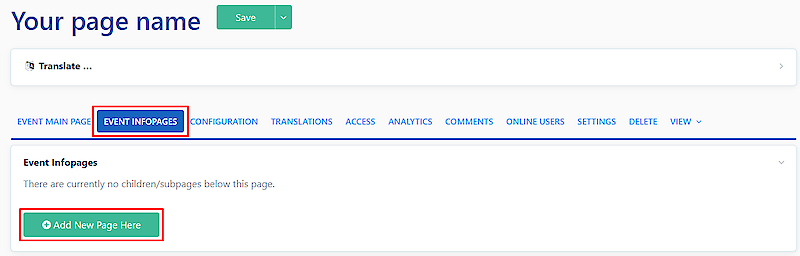
1. Click on "EVENT INFOPAGES" in the top menu bar.
2. Click on the "Add a new page here" button.
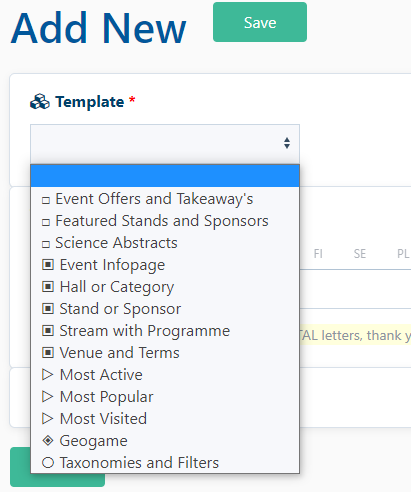
3. Select the subpage type in the "Template" field.
4. Enter the title of the subpage you want to create.
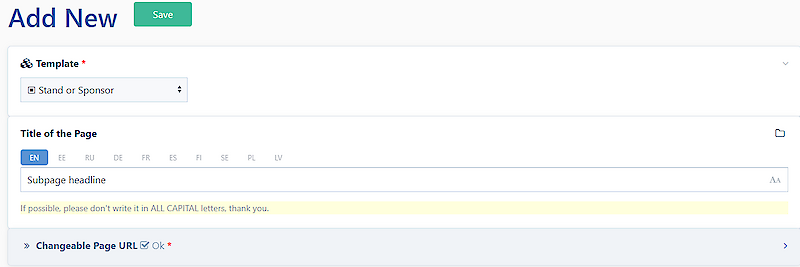
5. Click on the "SAVE" button at the top or bottom of the page.
The created subpage will open where you can start adding information.
Here you'll find instructions on how to add different information to the page, and which options to use.
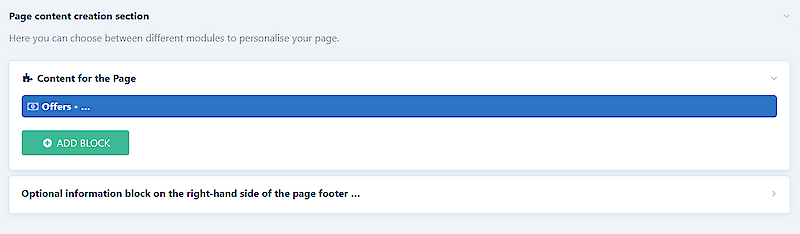
1. Scroll down to the topic "Page content creation section".
2. Click on the "ADD PLOCK" button.
3. A pop-up window will appear. Select the option "Text".
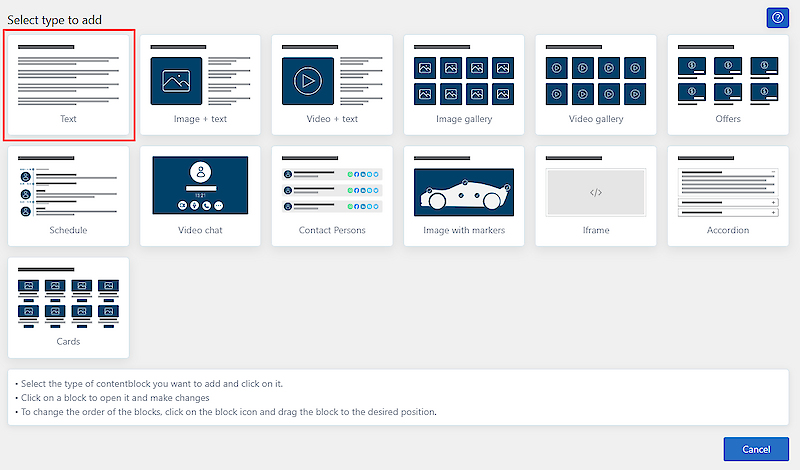
4. Text block is added to the admin view.
5. Add the desired content in the "Text block" field.
6. Click the "SAVE" button at the top or bottom of the page.
1. Scroll down to the topic "Page content creation section".
2. Click on the "ADD PLOCK" button.
3. A pop-up window will appear. Select the option "Image+Text".
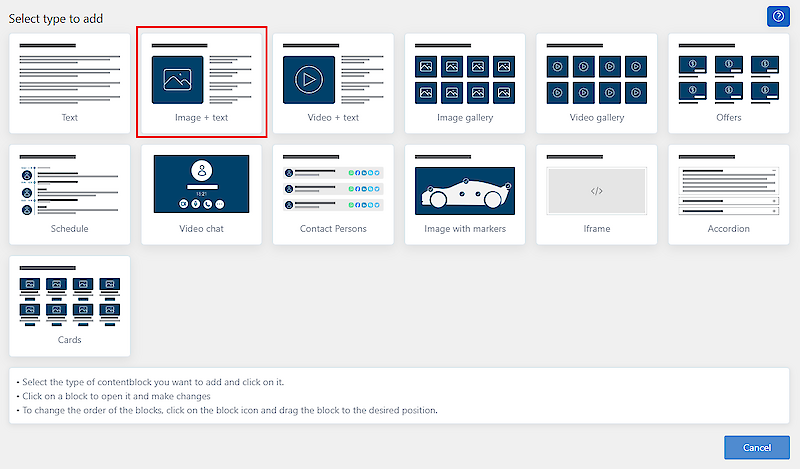
4. Image+Text is added to the admin view.
5. Add the desired content in the "Content Text" field and upload the image.
6. Click the "SAVE" button at the top or bottom of the page.
1. Scroll down to the topic "Page content creation section".
2. Click on the "ADD PLOCK" button.
3. A pop-up window will appear. Select the option "Video+text".
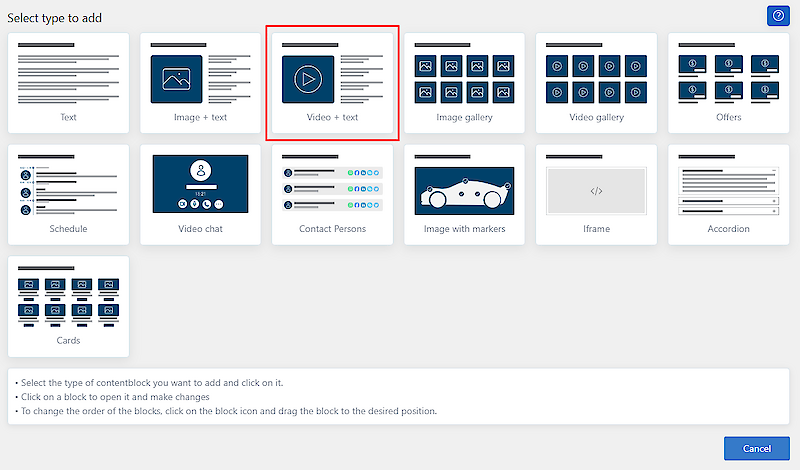
4. Video+Text is added to the admin view.
5. Add the desired content in the "Short Text" field and insert Youtube/Vimeo link to field "Videobanner".
6. Click the "SAVE" button at the top or bottom of the page.
1. Scroll down to the topic "Page content creation section".
2. Click on the "ADD PLOCK" button.
3. A pop-up window will appear. Select the option "Image gallery".
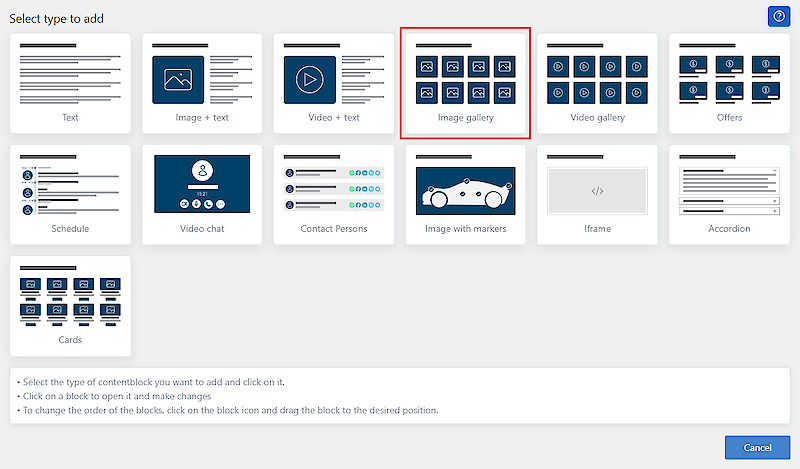
4. Image galleru block is added to the admin view.
5. Add the desired images to the field "Images container"
6. Click the "SAVE" button at the top or bottom of the page.
1. Scroll down to the topic "Page content creation section".
2. Click on the "ADD PLOCK" button.
3. A pop-up window will appear. Select the option "Video gallery".
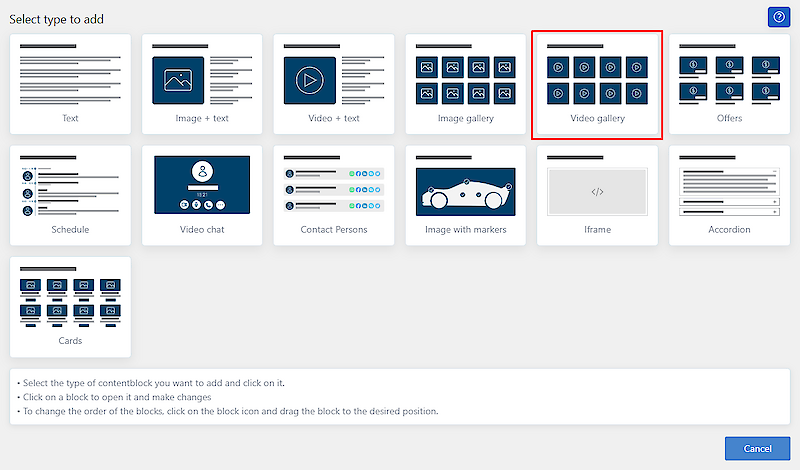
4. Video gallery block is added to the admin view.
5. Add the desired video links (Youtube or vimeo) - AFTER EVERY LINK PUSH "ENTER", so that every link is on different lane
6. Click the "SAVE" button at the top or bottom of the page.
1. Scroll down to the topic "Page content creation section".
2. Click on the "ADD PLOCK" button.
3. A pop-up window will appear. Select the option "Schedule".
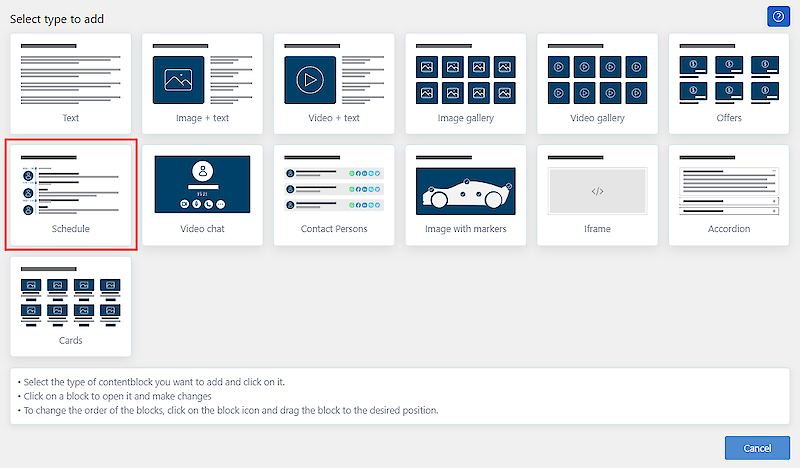
4. Schedule is added to the admin view.
5. Add the times, title and a short description of the activity.
6. Click the "SAVE" button at the top or bottom of the page.
1. Scroll down to the topic "Page content creation section".
2. Click on the "ADD PLOCK" button.
3. A pop-up window will appear. Select "Video chat"

4. The Video chat block is added to the Admin view.
5. It is possible to add a title to the video chat, but not mandatory.
6. Click on the "SAVE" button at the top or bottom of the page.
PS: Video chat is like a chat room. You don't need to be logged in to video chat. To video chat with a booth visitor, you must have your booth view open in your browser tab.
The solution also works if you are using tab 1 but have the stand view open on tab 2.
1. Scroll down to the topic "Page content creation section".
2. Click on the "ADD PLOCK" button.
3. A pop-up window will appear. Select "Contact persons"
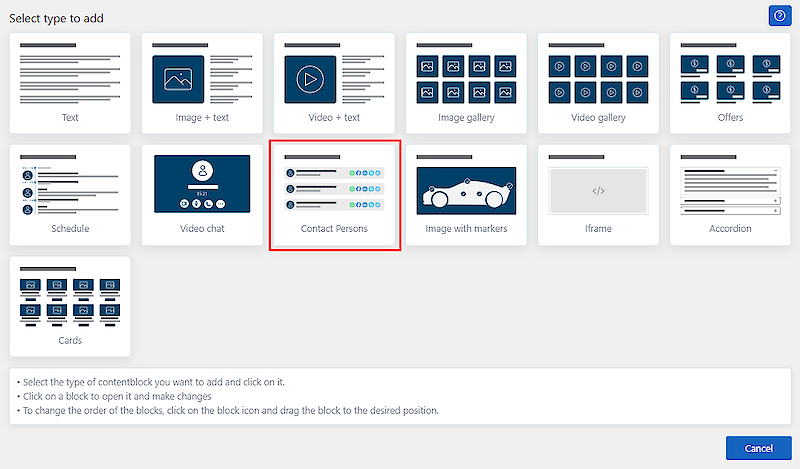
4. The Contact persons block is added to the Admin view.
5. It is possible to add links and contact details of different communication channels under contact persons. If you want to add more than one person, create a new Contact person block for each person.
6. Click on the "SAVE" button at the top or bottom of the page.
1. Scroll down to the topic "Page content creation section".
2. Click on the "ADD PLOCK" button.
3. A pop-up window will appear. Select the option "Image with markers".
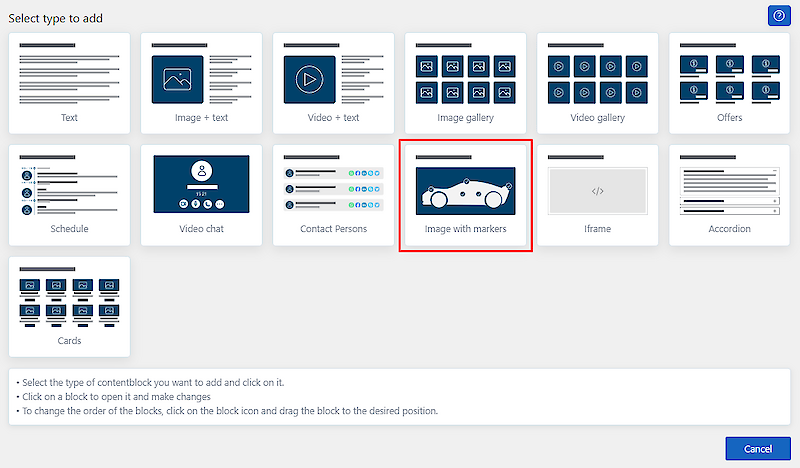
4. An Image with guidelines block is added to the Admin view.
5. Add a map/image file to your event plan and click the "Save" button at the top or bottom of the page.
6. Re-open the Image with guidelines block. From the "Page Markers" information field (the system will provide you with event subpages), select the pages you want to display on the image/map and click the "Save" button again.
7. Re-open the Image with guidelines information block. In the top left corner of the image, a red dot (depending on how many subpages you previously selected) with a number will appear. Move the marble to the desired location and press the "Save" button.

P.S.: The system will display the dot number information below added picture.
A solution for inserting information with a picture and short text. Topic items are displayed next to each other, and clicking on a topic item displays the content of the topic below.
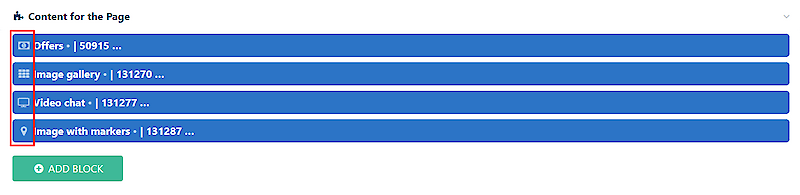
1. Scroll to the topic "Content for the Page".
2. Click on the button "ADD PLOCK".
3. A pop-up window will appear. Select the option "Tabs".
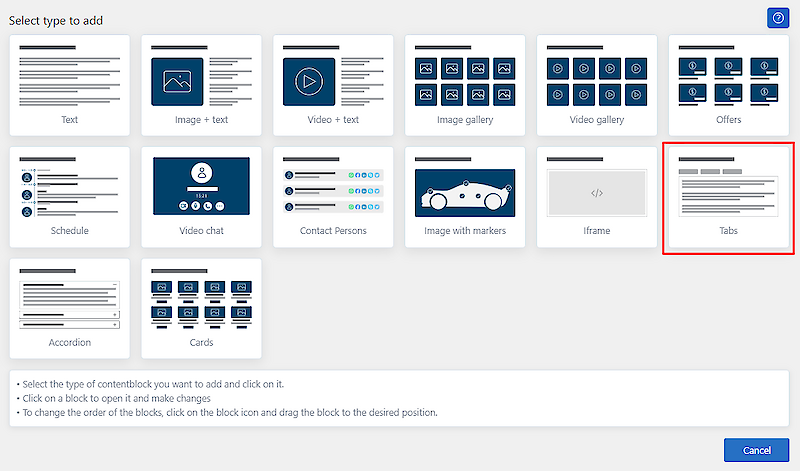
4. A tabs block is added to the Admin view. You can but do not need to add a title to the block.
5. To add a tab, click "Add New" on the active text - fields will open where you can add a title and short description of the tab topic.
6. To add a new card, click on the "Add new" button again.
7. Click on the "SAVE" button at the top or bottom of the page to save the added tabs.
A solution for frequently asked questions or for displaying information in a compact way
1. Scroll down to the topic "Page content creation section".
2. Click on the "ADD PLOCK" button.
3. A pop-up window will appear. Select "Accordion"
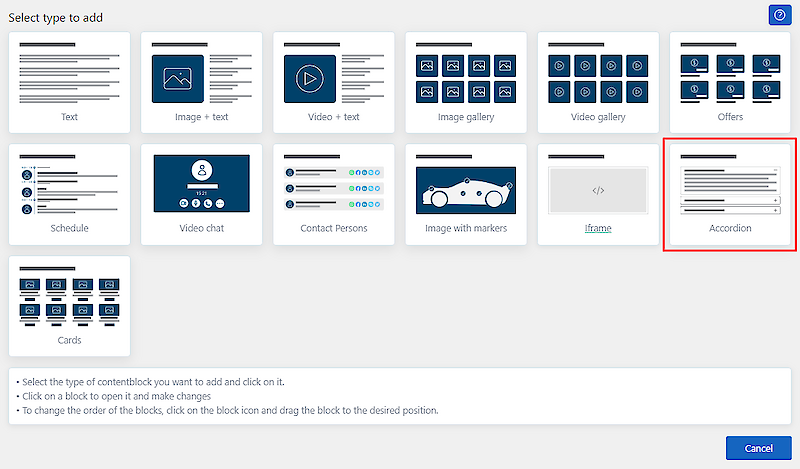
4. The Accordion block is added to the Admin view. You can but do not need to add a title to the block.
5. Click the "Add accordion item" button. Add a topic/question in the field "Headline" and a longer text or answer to the question in the field "Main text".
To add a new topic, click again on the button "Add accordion item".
6. Click on the "SAVE" button at the top or bottom of the page.
A solution for inserting information with a picture and short text. Possibility to add a button and a link to navigate away from the page.
1. Scroll down to the topic "Page content creation section".
2. Click on the "ADD PLOCK" button.
3. A pop-up window will appear. Select "Cards"
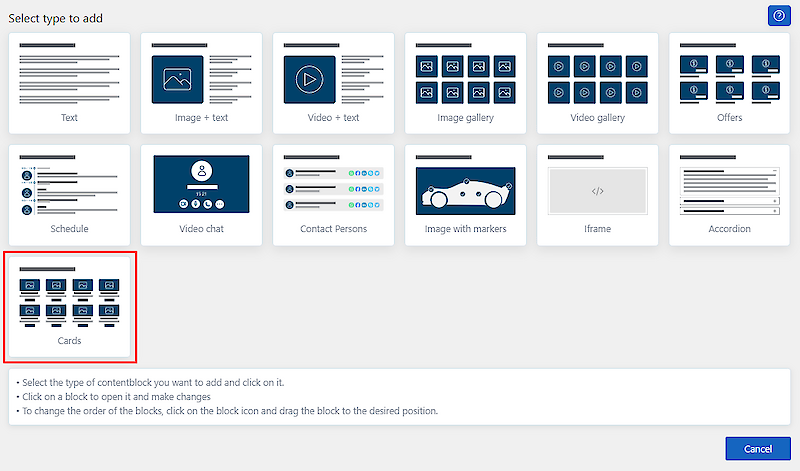
4. A Card block is added to the Admin view. You can but do not need to add a title to the block.
5. By clicking on the active item "Block settings" you can choose how many cards you want to display side by side. In addition, you can select the scale of the image to be added.
6. To add a card, click on the active text "Default card" - fields will open where you can add an image, a title and a short description. To add a link, click on the YES button - a field for adding a link opens and you can select the information (title, image, short text) to which you want to add the link.
7. To add a new card, click the "Default card" button again.
6. To save the information, press the "SAVE" button at the top or bottom of the page.
1. Click on the icon in front of the info block and drag the block to the desired location.
2. Press the "SAVE" button to save the new location.
1. Move the cursor to the content block you want to hide.
2. Icons appear in the right part of the content block.
3.Click the "On/off" button.
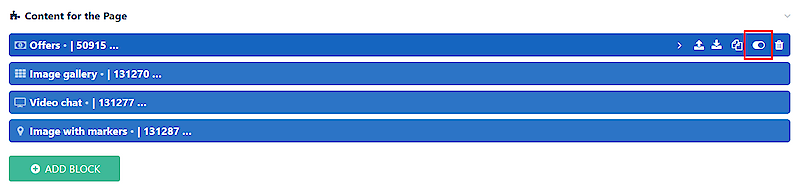
4. Press the "SAVE" button at the top or bottom of the page.
The colour of the hidden content block changes and the text becomes strikethrough.
You can make the content block visible by pressing the "on/off" button again and then pressing the "SAVE" button.
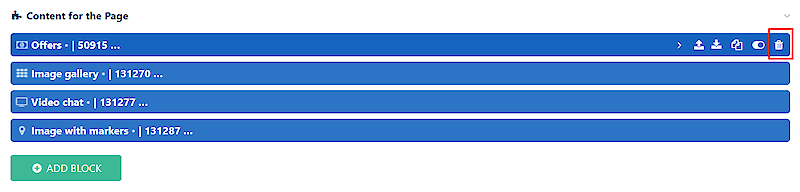
1. Move the cursor to the content block you want to delete.
2. Icons appear on the right edge of the content block.
3. Click on the trash icon.
4. Click on the "SAVE" button at the top or bottom of the page.
1. Move the cursor to the content block you want to copy or clone.
2. Icons appear on the right edge of the content block.
3. Click on the icon with two pages
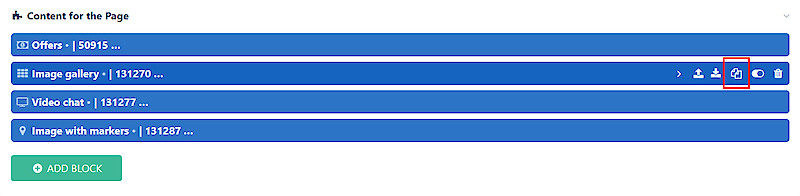
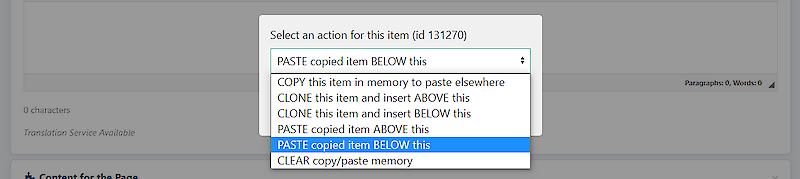
4. Select the action you want to do
5. Click on the "SAVE" button at the top or bottom of the page
If you want to copy-paste an existing content block to another subpage, first copy the content block to memory (the first option) and then open the subpage where you want to place the content block. The text "PASTE" will appear below the main content of the page - click on it and then click the "SAVE" button.

Here you will find tutorials and tips on how to use logos, images and videos in different ways on your page.
1. In the Admin Environment subsection, there is a topic on "Graphical elements". Click on it. The graphics information fields will open.
2. Click on "Logo"
3. Upload your logo file (gif, jpg, jpeg, png) to the environment.
![]()
4. Click on the "SAVE" button at the top or bottom of the page.
If you have a version of the logo in English, Estonian and Russian and you want to display the logo version in the language selection, please follow the steps below:
![]()
The format of the banner is determined by the event organiser. Choice of formats:
1. At the bottom of the admin environment, there is a topic called "Graphical Elements". Click on it. The graphics information fields will open.
2. Click on "Day Banner".
3. Upload a header banner in the appropriate format, at least 1920px wide.
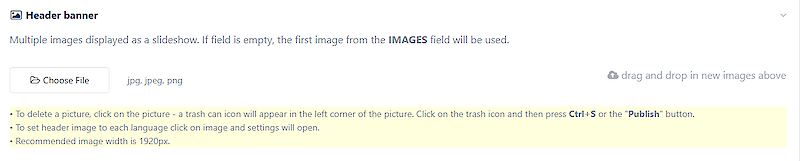
4. Click the "SAVE" button at the top or bottom of the page.
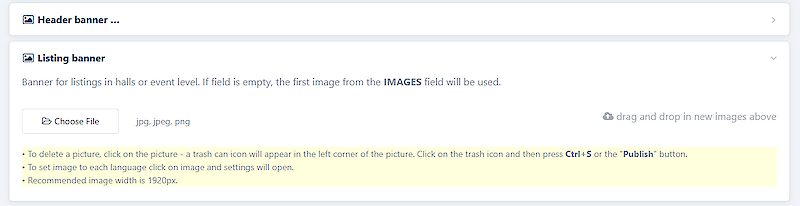
The image added to the list banner field will be displayed as a preview image in the halls or catechories.
1. In the Admin environment, there is a topic called "Graphical Elements". Click on it. The graphics information fields will open.
2. Click on "List of banners".
3. Upload an image file in 1920x1080px format.
4. Click the "SAVE" button at the top or bottom of the page.
The video added to the video banner field is displayed at the top of the page.
1. In the bottom of the Admin environment, there is a topic called "Graphical elements". Click on it. The graphics information fields will open.
2. Click on "Video Banner in the header".
3. In the link field, add a video link address from Youtube or Vimeo.
4. Click on the "SAVE" button at the top or bottom of the page.
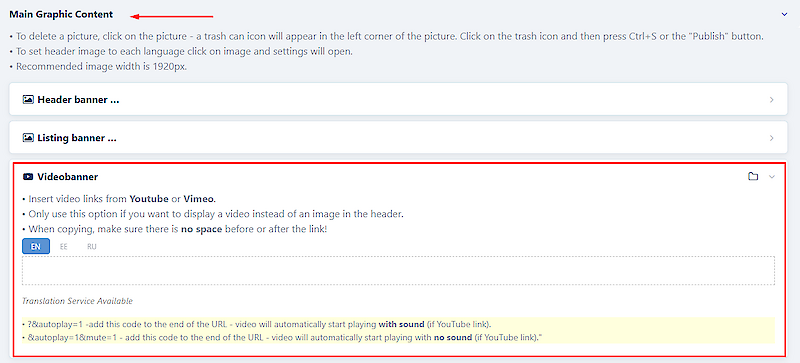
PS: when using video in the header, it will be displayed at 1920x1080px, even if the header is otherwise set to a smaller image area.
With the embed code added to this field, you can place a video uploaded to a medium other than Youtube or Vimeo at the top of the page.
1. At the bottom of the admin environment, there is a topic called "Graphical elements". Click on it. The Graphics information fields will open.
2. Click on the "Video banner header (iframe)" item.
3. Add the video embed code to the field
4. Click on the 'SAVE' button at the top or bottom of the page.
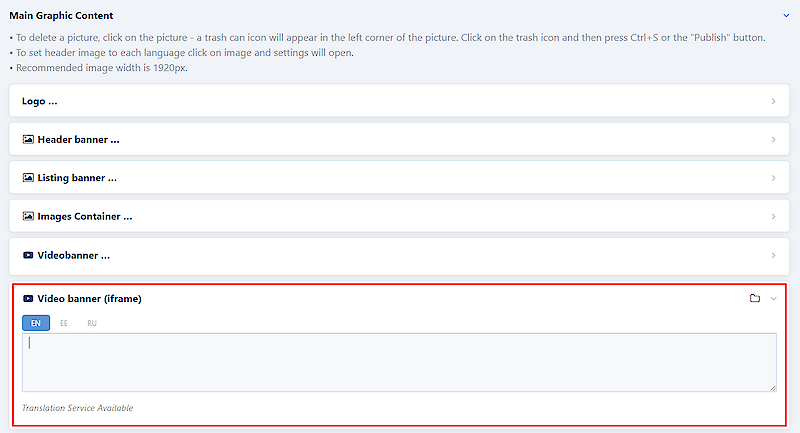
PS: when using a video in the header, it will be displayed in 1920x1080px, even if the page header is otherwise set to a smaller image.
1. Open the information block where you want to change the order of the uploaded images.
2. Click on the image you want to move
3. Move the image to the desired location
4. Click on the "SAVE" button at the top or bottom of the page.
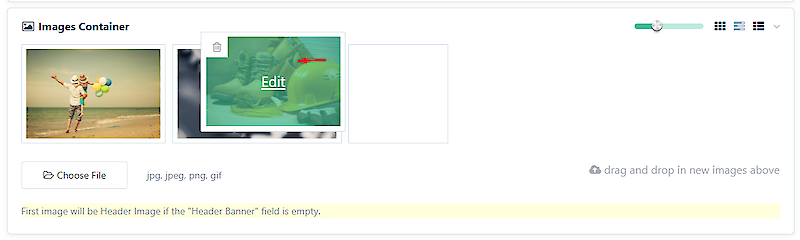
1. Move the cursor over the picture you want to delete. A trash can icon appears in the top left corner of the image.
2. Click on the bin icon - a red line will appear around the image.
3. Click on the "SAVE" button at the top or bottom of the page.
NB: To delete all the images in the infoblock, click the trash icon three times. Red boxes will appear around the images. Click on the 'SAVE' button at the top or bottom of the page.
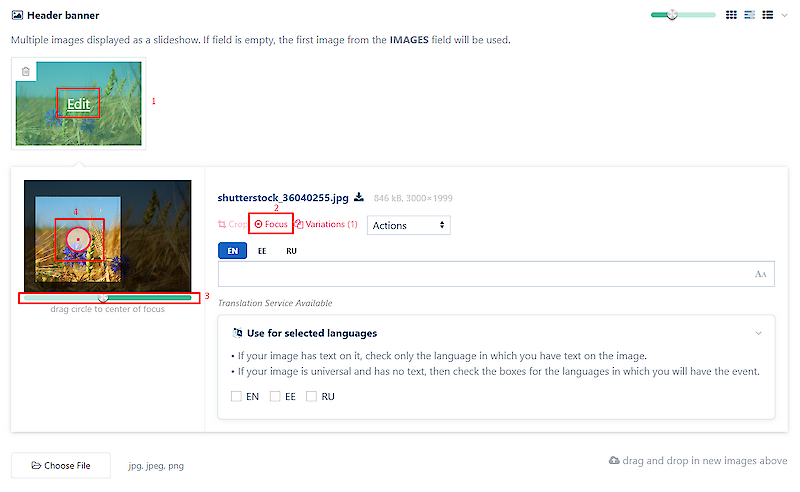
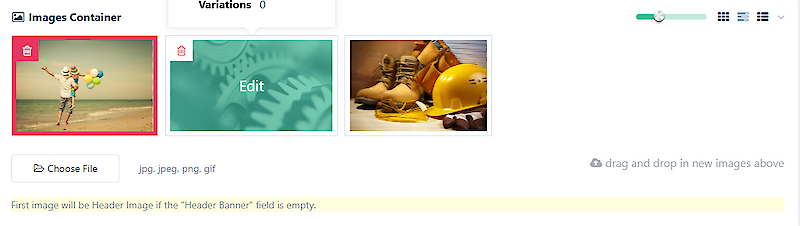
If the uploaded image does not match the image area format, the environment will display a certain area of the image. You have the option to select the area to be displayed. For example, it is a good option to set the display of a Performer image.
1. Click on the image you want to change the focus of.
2. The text "Edit" appears on the image - click on this text.
3. The image settings will open. Click on the "Focus" button.
4. A bar will appear below the image, allowing you to select the area of the image to be displayed.
5. A red circle will appear on top of the image, which you can move to select which part of the image you want to focus on.
6. When the area you want is highlighted, click the "SHOOT" button at the top or bottom of the page.